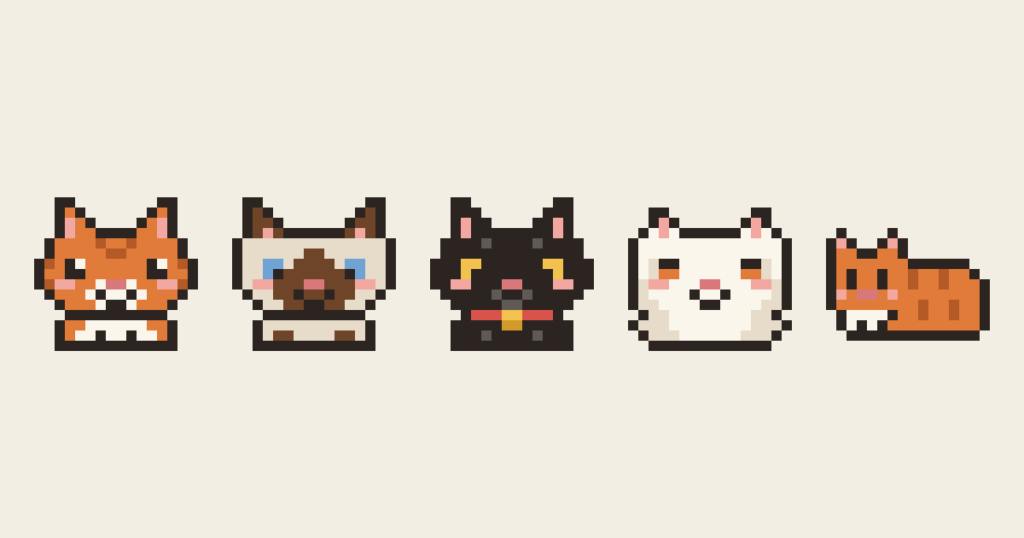
Cats are one of the most popular things to draw in pixel art, and one of the easiest to get almost right. A round head with two triangles on top looks like a cat at a glance, but look closer and it could just as easily be a fox, a bear or a slightly confused hamster. This guide is about closing that gap: the small, specific choices that make a sprite unmistakably feline.
All five examples come from our Cat Sprite Collection, drawn on a 16 × 16 grid with one shared palette. If you’re new to tiny sprites, start with How to Draw Cute Pixel Art Animals, which covers the tools, the proportions that make a character cute, and a step-by-step method for building any animal. This guide picks up where that one leaves off and goes straight to the cat.
The three things that say “cat”
At 16 × 16 there’s no room for realism, so a sprite has to lean on a handful of signals. Get these three right and almost everything else is up to you.
- Ears with a straight outside edge. A cat’s ear isn’t a symmetrical triangle. The outside edge runs nearly straight up and the inside edge slopes down towards the forehead. That lopsided shape is what separates a cat from a fox, whose ears are taller and more evenly pointed.
- Cheeks that stick out. Cats are widest at eye level, not at the top of the head. Pushing the outline out by a pixel on each side, right where the eyes are, gives the chubby cheeks that make a face read as feline rather than as a rounded square.
- A small, neat muzzle. A tiny nose, a lighter patch of fur around it and a little mouth underneath. Dogs and bears have big, forward noses; cats keep everything compact and close to the centre of the face.
Everything else, from coat patterns to poses, is personality. Each example below focuses on one of those.
Example 1: The tabby
The tabby is our reference cat. Almost every front-facing sprite in the pack starts from this head, so it’s worth looking at piece by piece.

- Ears: Each ear is a little staircase four rows tall. The top row is two pixels of outline, and each row below adds one pixel on the inside while the outside edge stays in the same column. A short stripe of Blush (
#F2A7A0) runs down the middle of each ear. - Cheeks: The top of the head is fourteen pixels wide, but for the three rows holding the eyes and nose it widens to the full sixteen, then steps back in towards the chin. You’d never notice it as a feature, but take it away and the head goes flat.
- The “M” mark: Real tabbies have a dark M on their forehead. Here, four pixels of Rust (
#B35A26) in a small V suggest it, and two single Rust pixels on the edge of each cheek look like the ends of stripes wrapping round the head. Markings that touch the outline do more than markings floating in the middle. - Eyes: Each eye is a 2 × 2 block of Ink (
#2B2420) with one pixel swapped for Cream (#FBF6EC) in the top corner. That single highlight makes the eye look bright and alive. Put it in the same corner on both eyes, as if the light comes from one direction, or the cat will look cross-eyed. - Muzzle: A two-pixel Rose (
#D9787A) nose sits in a little patch of Cream, with a four-pixel “u” of outline colour underneath for the mouth. The cream patch separates the mouth from the orange fur and gives the cat its soft, whiskery snout without drawing a single whisker.
If you only draw one cat from this guide, make it this one. Every other cat on this page is a variation on it.
Example 2: The Siamese
The Siamese shows how far a coat pattern alone can take you. Its outline is almost identical to the tabby’s; what makes it a Siamese is where the dark colour goes.

Siamese are “colourpoint” cats: pale all over, with darker fur on the ears, face, paws and tail. So don’t think of the pattern as stripes or spots. Think of it as one colour, Cocoa (#6E4529), placed only at the ends of the cat.
- Start pale. Draw the whole cat in Oat (
#E6DCC9) first. On its own it could be any cream-coloured cat. - Paint the mask as a diamond. It starts as two pixels in the middle of the forehead and widens by two pixels every row, to eight across at nose level, before narrowing again around the mouth. That steady widening is what makes it read as a mask rather than a smudge.
- Darken the ears and paws. Fill the ears with Cocoa, keeping one pixel of Blush at the base, and add two-pixel Cocoa paws. Repeating the colour at the edges ties the pattern together.
- Give it blue eyes. Eye colour is a great way to say “breed” at this size. Each eye is three pixels of Lake (
#6FA3D4) with an Ink pupil tucked into the inner bottom corner. Pointing the pupils slightly inwards gives the Siamese its famous intense stare.
The same idea works for any bold pattern: decide what shape it is, then place it as one flat block of colour rather than trying to blend it in.
Example 3: The black cat
Black cats are a favourite and a famous headache. When the fur is the same colour as the outline, the outline disappears, and every line you’d normally draw inside it vanishes into the fur. Our cat Midnight solves this in four steps, shown from left to right.

- Trust the silhouette. With no interior lines, the outer shape carries everything, so the pointed ears and wide cheeks need to be crisp. If the solid black shape on the left doesn’t say “cat”, nothing you add later will fix it.
- Make the eyes glow. Bright Honey (
#F2C14E) eyes are the first thing anyone sees on a black cat. Each is three pixels in an L-shape around an Ink pupil. Use your brightest, warmest colour; a muted one will sink into the fur. - Flip your line colour. On a light cat the mouth is dark. On a black cat, draw it in something lighter than the fur. Midnight’s mouth is Charcoal (
#5F5A56), and a few more Charcoal pixels on the forehead and at the bottom hint at the head and paws. Pink ears, nose and cheeks keep the cat cute rather than spooky. - Break up the black. A Poppy (
#D9534A) collar with a Honey bell splits the head from the body in one move. It’s a costume detail, but also a structural one: it replaces the chin line you can no longer see.
The alternative is to draw the fur a step lighter than black, such as Charcoal or Navy (#34405A), and keep Ink for the edges. It still reads as a black cat, and you get your interior lines back. Either way, black cats look best on a light background, which is worth remembering if you’re designing a sticker, icon or game tile.
Example 4: The Persian
The Persian teaches two things: how to draw fluff without drawing fur, and how much expression lives in a cat’s eyelids.

Fluff is a silhouette, not a texture. In the grey shape on the left, the head runs the full width of the canvas, the ears have shrunk to tiny nubs at the corners, and the bottom edge zigzags in and out by a pixel: fourteen wide, then sixteen, then fourteen again. That uneven edge suggests a big ruff of fur. Individual strands would just turn into noise at this size.
With such a big head, keep the face small and low. All of the Persian’s features sit in the lower half of the head, which gives it that squashed, flat-faced look. A soft Oat shade along the cheeks and chin stops the white fur looking like a blank sheet of paper.
Eyelids do the acting. The three faces on the right differ by just eight pixels. Each eye is a 2 × 2 space, and what you put in it sets the mood:
- Awake: three pixels of Ember (
#E07B39) and an Ink pupil. Bright and curious. - Asleep: fur on top, a line of Ink below. A closed eye drawn low looks peaceful and content.
- Unimpressed: Ink on top, Ember below. A heavy lid over a sliver of colour. This is the version in the pack, and the one that makes people laugh.
Before you reach for eyebrows or tears, try changing which half of the eye is lid.
Example 5: The loaf
Sooner or later you’ll want a whole cat, not just a head. The loaf, with paws tucked underneath and body neatly rectangular, is the friendliest full-body pose to start with, because it’s barely more than two boxes.

- The head is a shrunk-down tabby. At eight pixels wide it’s the same recipe: pointed ears with pink insides, eyes, a Rose nose and blush either side. The eyes drop to 1 × 2 pixels with a two-pixel gap, and the ears shrink to two rows. The head sits a little higher than the back, which makes the cat look alert rather than flattened.
- The body is a rounded box. The back curves down one pixel at a time at the far end, and the bottom edge is completely flat, because the cat is sitting on it. That flat base is what turns a lying-down cat into a loaf.
- Stripes go around, not along. The Rust stripes are short vertical pairs, with the lower pair shifted one pixel to the right. That offset makes them look like they wrap around a rounded body. Lined up perfectly, they’d look like a barcode.
- Tuck in the paws. A strip of Cream under the chin, split into two paws by a single Ink pixel, is all you need. No legs, no tail.
Once the loaf feels comfortable, the same two shapes stretch into other poses. Round the body into a circle and wrap the tail around the front for a sleeping cat, or stand it upright behind the head with the tail curled up one side for a sitting cat. The head stays the same; only the box behind it changes.
A quick guide to coat patterns
Once you have a head you’re happy with, you can turn it into almost any cat just by repainting it:
- Tuxedo: dark fur with a white stripe that starts between the eyes and widens over the muzzle, plus a white chest. Keep the white symmetrical, like a shirt front.
- Calico: a white face with orange on one side of the head and grey or black on the other. Let the patches be slightly different shapes; perfect symmetry looks like a mask.
- Grey: Stone (
#8F8A85) fur with a lighter Mist (#C9C4BD) muzzle. Green eyes look especially good against grey.
Whatever the coat, stick to one base colour, one marking colour and one light colour for the muzzle. Three fur colours is plenty for a 16 × 16 cat.
Cat-specific mistakes to watch for
- Ears too short or too round. Short ears turn a cat into a bear; round ones turn it into a mouse. Give each ear at least three rows ending in a single-pixel point, with a straight outside edge so it doesn’t drift towards a fox.
- Drawing whiskers. Lines coming off the face at 16 × 16 look like a moustache. Let the cheeks and muzzle patch suggest them instead, or try a single pixel poking out past the outline on each side.
- Stripes everywhere. A tabby with stripes on every row just looks busy. Pick two or three places, such as the forehead, cheeks and back, and leave the rest plain.
- A dog-sized nose. Two pixels is plenty, and one will do on a smaller sprite. A wide nose pulls the whole face forward into a snout.
Try it yourself
Draw the tabby head from Example 1 and save it. Then, without moving a single outline pixel, repaint it three times:
- As a Siamese: pale fur, a diamond mask, dark ears and blue eyes.
- As a black cat: Ink fur, bright eyes and a Charcoal mouth. Notice how much outline disappears, and decide whether it needs a collar.
- As your own cat: or one you’d like to have. Look at a photo and pick out the one marking that makes them them.
Then give your favourite each of the three Persian expressions. You’ll end up with a handful of very different cats from one outline, and a good feel for how much the coat and the eyes are doing.
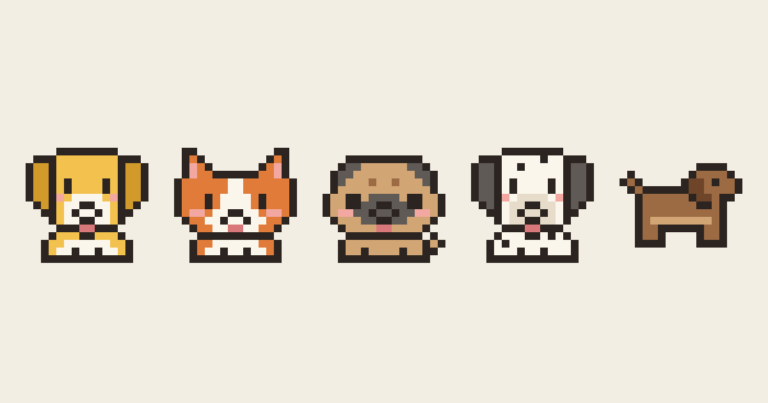
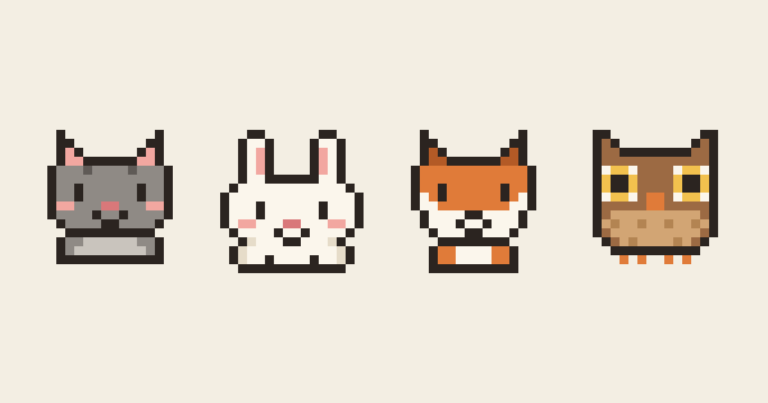
For more characters to study, our 20 Cute Pixel Art Animals collection uses the same grid and palette, so you can see how a cat’s head shape turns into a bear, a mouse or a panda. And if cats are your thing, the full Cat Sprite Collection has all twenty of ours, from the loaf to a cat in a teacup.
1 comment